 Eyelets & buttonholes have been one of the most common means of holding one's clothes on... for a really, really long time.
Before 1800, hand-sewn eyelets were regularly used in bodies, stays & corsets for women, and occasionally on men's clothes. French Eyes & grommets were not widely used until the mid to late 1800's & hand-sewn eyelets continued to be used long after machine cams were developed to make them "easier."
When you need a hole in a corset or similar garment, (one that is going to take some stress), it has to be a strong hole. Therefore, the threads cannot be cut or split, they must be separated or spread. If an eyelet is purely decorative, use the machine cam; it's faster & very consistent.
There are several methods of sewing eyelets, this one works quite well for me.
Making Holes:
1. Mark your holes with a removable marking tool (fabric pen, chalk, etc.)

 2. Carefully poke a hole with an awl. The awl should be large enough to make the desired size eyelet, but not so large that it splits the threads of the fabric.
Some splitting may occur, but try not to create rips.
Re-open the holes with the awl prior to sewing each one to "neaten" the edges as they should tend to close back in.
Sewing Eyelets:
Turn the garment so as not to strain your hand; plan on a lot of re-arranging.

 3. Lose your thread between the layers of fabric & secure it with the double-loop knot on the wrong side of the garment.
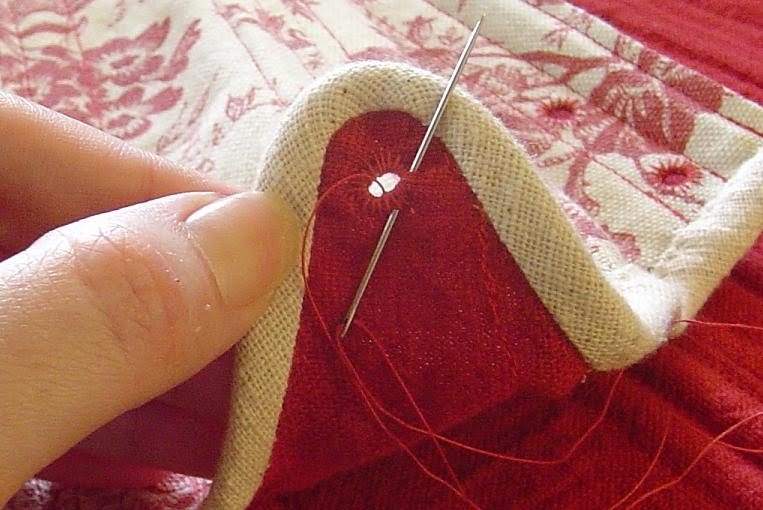
 4. Pass your needle & thread to the right side of the garment & start your button hole stitch by looping the thread around the needle once, in the direction you are going. Do not change direction.
 5. Continue around the hole, at a consistent distance (1/16" - 1/8") to create a star-burst pattern in thread. Pull each thread tight, but not so tight that it wrinkles the fabric. The edge of a circle should emerge. Each thread should be about 3 threads apart in the weave of the fabric.
 6. Once you finish the circle you can either go around again for a classic 'finished' eyelet, placing the second row of threads between the first...
OR
pass the thread to the back side & complete the eyelet as in step 7.
 7. Insert the needle between the layers of fabric next to where you started & make a circle of thread around the eyelet (between all your stitches). This adds a little stability to the eyelet. DO NOT pull it tight.
This is optional, but it works to secure your thread & shape the eyelet.
8. Either lose the thread in the fabric or go on to the next eyelet between the fabric layers.
*Only move from one eyelet to another if you know you have enough thread to finish. Never make an eyelet out of 2 separate threads (it works, but looks terrible).
Finishing the Eyelet:
 9. The eyelet will be much smaller than a workable hole, so gently re-open it with an awl. This will help to re-shape the hole & make it look like a beautiful eyelet. (if you pulled too tight, you may have to use a smaller awl).
Unless your fabric is fraying badly NEVER use fray check on an eyelet. It makes it stiff & uncomfortable. If the fabric is fraying, go for it (test first).
I've found that this type of eyelet, sewn with Hand Quilting cotton thread will last for several years without repairs.
Different methods will suit different people & projects, so make sure you know what style you want on a garment before you invest the time & effort.
If you have a lot of these little darlings to do, take regular breaks to save your hands.
No comments:
Post a Comment