Showing posts with label dying. Show all posts

Sunday, September 30, 2012

Fruit of Many Colors: Sumac Berries

staghorn sumac
Sumac berries are pretty all year long.  I love them.  You can eat them,* birds eat them... they are pretty.  Did I mention how pretty they are?  They are also a horrible weed.  But like most weeds they are quite useful if you know how to use them.
*if you aren't allergic.

Last year I collected quite a few sumac berry torches (that's how I think of them, as these big, bright red torches shining on the trees).  I dried them; planned on using them over the winter... never got to it.  "Now" was a good time, so I soaked them in water overnight & let them sit out in the sun in a big old pot. About 1/2 a peck.


On Day 2 I steeped the pot in warm(ing) water for 30 minutes, boiled for 30 minutes, mashing the lovely things the whole time.... OK, once in a while... at least every 10 minutes or so... until they turned kinda brownish.

Boiling sumac berries smelled soooooo goood!
Because of the size of the pot, rather than pouring out the mash, I dipped out the liquid & strained the berries out of that.

2 paper towels as final strainer

The recipe I was reading (YES, a Recipe!!!) gave a few different options for these berries. 
http://vikland.tripod.com/sumac.html 

The first batches were alum mordant on finished yarn, with various soak times & after-mordants like vinegar & ammonia.  I think you can read what the tags say (sorry it's tipped - I have no idea how to fix that on this format).  They ranged from a very nice flax color to golden yellow.


Since I got so much of it, I figured I'd do a few different things.  I liked the idea of a heathered gray, and the best way to get that is to dye the fleece and spin after. 

To get gray from sumac berries, you need to soak the wool in an iron after-bath.  To get that, you can either add ferric to the water or keep a plastic canister of rusting nails & just pour out the water once in a while... since I had neither, but plenty of Stuff That's Rusty, I went out & found a bit of junk that would fit in the pot.  Joys of farm-life.
adding rusty iron to water
Once I got the liquid free of pretty berries, I wetted some clean fleece in a mesh bag and dunked it in the pot.  (Now a much smaller pot). 
Boiled for 30 40 minutes and then transferred to the Iron pot.

sumac berry & iron dyed fleece
I've carded up a bit of it, but haven't started spinning it yet.  I'd like to get the whole chunk in rolags before I spin it.  I am losing most of the light undercoat & very dark tips, which is fine.

Saturday, August 25, 2012

Will This Thing Ever Dye? Comfrey

Well, yes, it will... but not "sage green" as the unfounded & lacking specific recipes chart said.
Actually, comfrey will make a lovely sage green, I just haven't figured out how.  I know this because I've seen it done many times on Google Image Search.  Just not by me.  By the time I find a real recipe the plants will be dead for the winter & I'll have to wait till next year.

Comfrey.  Useful. Horrible. Weed.
Anyway, Comfrey.  Multitude of uses, not least of which is Taking Over Your Flower Bed With Roots More Than Three Feet Deep.  No, really.  More than three feet.  I know this because that was the depth of the hole I dug 2 years ago trying to get rid of the nasty buggers.  Didn't work.  Filled the hole in.  Comfrey grew back.

Ooh, pretty green!  How promising...

So, in an attempt, perhaps a misguided one, to get rid of this horrid plant of many uses, I decided to chop some leaves off & cut them up into itty-bitty pieces courtesy of kitchen scissors & a blender; then toss all that green gook into a pot & boil me up some dye!  Surely this will produce a lovely soft sage green as all of the internet claims...

I can only tell you that I filled the pot, not how much things weighed.  Actually, I filled the pot twice, the second time after the first bit boiled down to an incredibly icky spinach looking thing that I don't want to contemplate eating.  So, two sauce pans of chopped green gloppy stuff to make a small dyebath.  (Surely I'll get a lovely sage green)... strained out several times through a paper towel & squeezed for any residual pigment...


Comfrey dye soup?  No thank you.
Into the pot goes the yarn!  (alum mordant)
After all that straining & draining we still have green stuff  "stuck in our teeth."  Yuck. (don't eat it).
Um... yarn's lookin' a bit yellow... OK, maybe it'll turn green later.
30 minute simmer as per (OMG there were directions!.. kinda)...
and...
Not-green comfrey dyed yarn
It's still yellow.  No, it's not green.  It's yellow.  Like a Bad Blonde Wig yellow.  OK, maybe it's not that bad.  Maybe I have to change the ph.  Maybe vinegar will work?  At least a dunk in something will help get all that horrid VM (vegetable matter) out of my nice clean wool!  Vinegar it is...

Not noodle soup, really.

Um... no green.  The green literally leached out into the vinegar leaving me with even MORE yellow.  Wasn't happy about that at the time. (Note to Self: vinegar makes things lighter - sometimes).

Best Pasta Impression of the Year
But after about 20 minutes of rinsing the stuff in cold water the comfrey bits finally let go of my poor yarn (mostly) and I got a nice pale yellow that seems rather stable.  Perhaps my dismay came from the pasta impression; "pasta = pain" for me.

Not-pasta yellow.
It's really not bad... it still looks a bit like spaghetti to me, but it is a nice pretty light yellow.  I'm not dissatisfied.  It just wasn't the sage green I was expecting.  I think next time I'll skip the mordant & see what happens.

Comfrey Yellow Dye Recipe:
1 saucepan of pureed comfrey (put it in a mesh bag, ok?) boiled/simmered for 1 hour.
Strain.  [Compost goop... or incinerate it in a Biohazard bag - that stuff will grow anywhere!]
1 skein of alum mordant wool yarn.
30 min. simmer.
Water/vinegar 4:1 rinse bath after-mordant
lots & lots of cold water to get the icky green bits out.
Spin wool out (Salad Spinner!), hang or lay to dry.

Dye! Dye! With Ragweed.


Ragweed yarn in ammonia.  Pretty.

Party Of One?  I had a good time anyway, and I didn't have to share my dyestuffs - which is both good and bad.  Good because I got to dye more of my stuff.  Bad because it's always fun to share with friends.  Ah well, "stuff" happens (like fall colds, getting called into work, and over-booking)... I really don't smell that bad... really.


I've been collecting dyestuffs all last year & this summer, and I've been spinning like mad to get enough yarn to dye up.  At 1/2 lb. I decided to cave in and mordant a bunch of yarn in alum, and cook up the weeds!
I use a "divide by 4" equation to figure out how much mordant to fiber I need. 

To make it easy:
1 lb. of wool = 16 oz.
16 divided by 4 = 4 oz. alum
2 tbsp = 1 oz. alum
4 x 2 = 8 tbsp alum into mordant water per lb. of fiber.
(or something like that)

In no particular order... 

In this case, it's literally a weed: Ragweed.

We cut the weeds in early summer (June), which was a little late to be doing that for a "young plant" but I swear they didn't grow until then!  Supposedly the color they give you is "olive green"... um, yeah... but with no info on what mordants, what fibers, hot/cold, how long, after-mordants, etc. it was impossible to tell how the claim of "olive green" came about.  Anyway, I didn't get olive green, I got golden yellow, which is quite lovely - as you can see.

Itch.  Itch.  Itch.
I ended up drying the ragweed in my solar dehydrator, because despite having 180 acres to roam about on, much of it farm fields; I couldn't for the life of me find more than a few plants of this over-abundant weed anywhere but right on the doorstep.  So it's dried, labeled & somehow got a lock of wool stuck in with it.


Itchy bag

It smelled soooooo good.


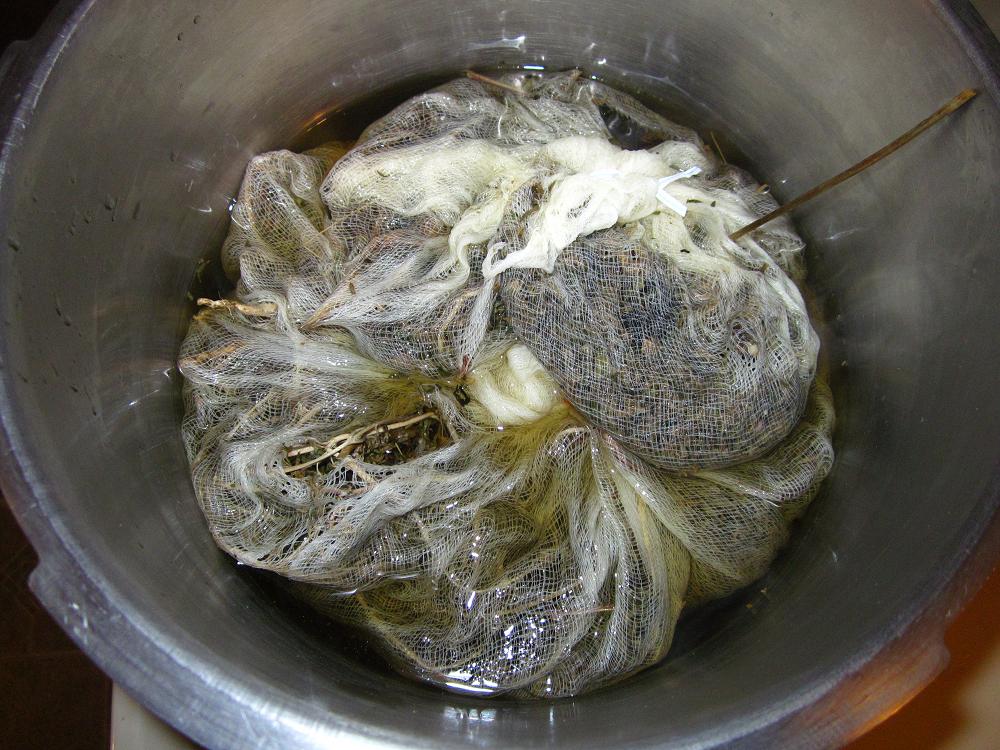
I was smart enough to wrap this batch of dyestuffs up in gauze (unlike the comfrey, which I'm still picking out of the yarn), so when I pulled the bag out of the "tea" there was very little straining that had to be done.  One paper towel in a colander took care of the escapees.
1 hr. of boiling extracted a good amount of dyestuffs, and I set the rest aside to see what I would get, (I later boiled it a 2nd time with fresh water for another hour & combined all that for another batch that is only a little weaker than the first - it's in a milk jug, carefully labeled, right now).  I can tell you that the kitchen smelled like the best tea you've ever tasted.  It was amazing.  No, I didn't taste it.

yarn simmering in ragweed dye

In went my trial hank of wool yarn, which I simmered for 1 hour then let it sit overnight because there wasn't much initial color change.  GOOD decision.

overnight color
When I pulled it out, it was a rather... eeh...ok-sorta-yellow-ish color.  Much better than it was the night before anyway.

stinky after-mordant
But it just smelled like it needed to go into ammonia, or something like that.  (I was still hoping for a cool green at this point).

Ragweed dyed yarn - wet.  It got more golden as it dried.
What I got was this totally awesome yellow-gold!  Spiffy. 
It's more gold/orange now as it dries.

So, in short, here's the Ragweed Recipe:
1 gal. bag dried ragweed in gauze bag, simmer/boil 1 hr.
Remove bag & strain.
Add hank of alum-mordant yarn.
Boil/simmer 1 hr.  Let cool & sit overnight.
Remove & drain yarn.
After-mordant in ammonia & cold water mixture.  Dunk a few times.
Rinse in cold water.
Spin out & hang or lay to dry.

Wednesday, July 4, 2012

Solar Dehydrator for Dyestuffs (or whatever)

It Dries!
It Dries Dyes!
A while back my electric dehydrator decided to fizzle out.  The fan stopped working, so while it goes round & round, nothing is happening.  On the 3rd day of trying to dry some sage, rosemary & cilantro (food), I about had a screaming fit & just shoved everything in paper bags to finish drying. 
Around that same time I saw a FB post of the prettiest garden box ever... turned out to be a solar food dehydrator.  Massively cool.

At that point, I decided that low-tech is better & as the "sun produces enough energy in one day to power America for a year," or some such like that, Solar it is!

I looked up various versions of a solar food dehydrator & decided to go with one I could build & move, and store inside when not in use... and one that I could make from materials on hand.  The one I ended up building is similar to this
http://www.territorialseed.com/product/13577/online_specials
except not nearly as pretty & it sits on a table, not on legs (see above).  Also, no nifty temp gauge. 
If you don't like this design, or don't want to pay that much for one, just go to Google Image Search & type in "how to make a solar food dehydrator" and about a million plans will pop right up, from super-fancy to cardboard box versions. 
There is a pdf. instruction guide that I saved but can't find again "dehydrator guide with photos" and "dehydrator plans" that is really decent.

I did make the door open up vs. dropping down because while I like the shelf idea, it was just too big to be able to reach the front of the dehydrator without some serious gymnastics... and we all know stuff is going to fall at some point.  A hook & eye safety latch will take care of the "crush your head" issue.

Materials:
Purchased:
$5 Garden plastic for my "black" bits & about $7 on hardware (screws, staples, hinges) for a total of $12 in purchased materials... I may have to calk the cracks for more efficient airflow, which would bring the cost up to around $15.
Re-used:
I used scrap wood on hand, bits left over from when my parents built the addition on the house, scrap lumber that was too short for other things or too knotty for structural projects & an old window that I /think/ came out of the laundry room that they tore down years ago.  The frame is in terrible shape on the outer edges, & the glass is cracked in one place... but for this, it'll work.  I used some old metal shelves that came from ??? for my drying racks & I can put gauze or smaller mesh screen or whatever over them as needed.  Paint was left over from the addition, (which still needs more paint in places).

Since I'm using it to dry dyestuffs, not food, the food safety aspect wasn't a huge issue for me.  I was able to skimp on the food grade screens & I didn't worry about the low VOC plastics or paints.  If I ever do want to dry food, I can always switch out the screens & find different plastic (it's just stapled in).  The paint should be fine after a few weeks anyway, but please do your research if you are going to use this for food; we get enough toxins from commercial food - no point adding them to your home-grown stuff.

The basic principle of the dehydrator is that the air comes in the bottom front opening (screened over), flows up through the airspace & exits the rear top opening (screened over).  The window lets light in to provide the means of heat (sunlight).  The black in the bottom & back wall heats the air as it goes through.  It's very much like a car in a parking lot. 
You can control how much heat & light get in by turning the box toward or away from the sun, and blocking off airflow, or covering some of the black with white cloth, etc. 

While I'm not sure how long some things will take to dry, it does work quite well.  My sage was dry in 2 days & so were the day lilies that I'm collecting for orange dye.  The Queen Ann's Lace seems to be taking a bit longer, which is interesting, if nothing else.

It does have to be taken inside when it's raining as it will wear out quickly if left out in the weather.  You could potentially make a weather-proof cover for it, like the ones they have for gas grills, but personally, I'd rather just bring it in.  In theory, you could use it in a window in the wintertime.

Should be loads of fun, and it's already proving useful.  I don't have to worry so much about things molding or getting rained on if a little sprinkle comes along, or the cats spraying on my dyestuffs (yuck), or a million other problems that come with open-air solar drying.


Tuesday, September 13, 2011

Sumac Bark Dye on Wool & Linen

As a first serious attempt at natural & mordant dying, I don't think it came out too badly. At least not all of my pretty wool bits have been turned into nasty little brillo pads... though some have. -This is coming from a person who has thrown canvas into a barrel of walnut gunk & called that dying - yuck.-

One thing to remember when dying wool: Heat + Agitation = Bad.

Here's how this color was achieved:

1. Peel the green bark off of sumac trees, (Pholem & Cambium). We just cut them down, they grow like weeds here.
2. Separate the brown bark from the green.
3. Dry the green.

I used 2 trees worth, or 1 mid-size cardboard box, about 12"x16"x12" for one pound of wool.
The bark wasn't pounded down, so this is an inexact measurement.

Weigh out one pound of dry wool (or other fiber).
Put in mesh bags, about 75% full so the wool has room to expand - Don't stuff the bag.

Mordant:
4 oz (8 tbsp) Alum
1 oz (2 tbsp) Cream of Tartar
Dissolve in a large pot of water.
Add wet wool
Heat for 1 hour between 160 & 180F.
-Never over 180.
Let sit overnight to a week depending on directions.
-This was 48 hours.

Apparently the fiber will only absorb so much mordant, so it's not a big deal. It does add weight to the fiber, so it's important to weigh it before, not after. Also important not to use too much mordant.

Dye:
Soak the bark in water, just covering the top. Soak overnight to a week depending on the dyestuffs. I soaked this for a week in plain water.
(Some people have said to add rubbing alcohol to help release the color, I didn't try that.)
Boil it. Pour/strain colored water off into another container, add more water & boil it again... about an hour. Once color stops coming off, you can throw the spent bark away... or dry it again if it's still giving color & you have all the dye you need.

I let it sit for 48 hours and as it sat the sap formed into resin at the top, which I was able to skim it off. I honestly have no idea how this is handled commercially, if at all. But it was very sticky & I really didn't want it on my fiber.
You can see the resin at the edges of the stainless steel bucket, it's reflecting the light strangely.

The bottom of the bucket had some really gross sediment. NOT what you want in your fiber... pour slowly & skim the rest of the good dye up in a bowl or ladle.

Dying:
In a large stainless steel pot (that's what I used here - the metal of the pot will change the color), add in the dye & the mordant fiber.
Heat to 160-180F for 1 hr. or longer until you get the desired color or until the fiber won't take any more or until the dye bath is spent.
Check it every 20 minutes - Do Not Agitate!


Rinsing:
Fill a large bowl with hot water, transfer the mesh bag of dyed fiber into the bowl of water & let sit.
Pull the bag out, dump the water, repeat until water runs clear.
The first batch took 4 rinses, the second batch took 3 rinses. I let it sit for about 10 minutes each rinse.

Drying:
Spin out the excess water in salad spinner or washing machine spin cycle (I have no issues with this at this point, it's as clean as anything else that goes in the washer).
Spread out to dry according to fiber type.

I put scraps of linen in the mordant & dye bath at the same time as the wool. Different fibers will dye different colors even with the same dye process.

After mordants, like rusty nails, copper scrubbies, vinegar, etc. are added into the last dye bath to change the color. I have not tried these.

Ummm... it's so pretty... like a Ginger Cat or a Pomeranian.

Saturday, June 18, 2011

Sumac Dye, Part 1

Today I began an adventure that I've been waiting to start since about mid-winter when the idea popped into my brain. You see... we have an abundance of natural dyestuffs growing all around us & simply don't use it because we either A: don't know about it, B: don't want to take the time/effort/energy to do anything about it... then there's always C: don't wanna.

I wanna, so I am.

After combing the internet & bookshelves for info on this stuff, I found that sumac is a decent dye material. Not perfect in color or fastness, but it has a wide range of colors & it's not like I have a shortage of available materials... that stuff IS a weed around here.

Sooo... I grabbed meself a little axe & hacked down some weed-trees. The barn is a bit easier to get into & I have some raw materials.
Of course, I had help...

For those of you who don't know, this is Clyde; a Cool Cat. He helped me chop trees down, strip leaves & made sure all the leaves went in the right box.

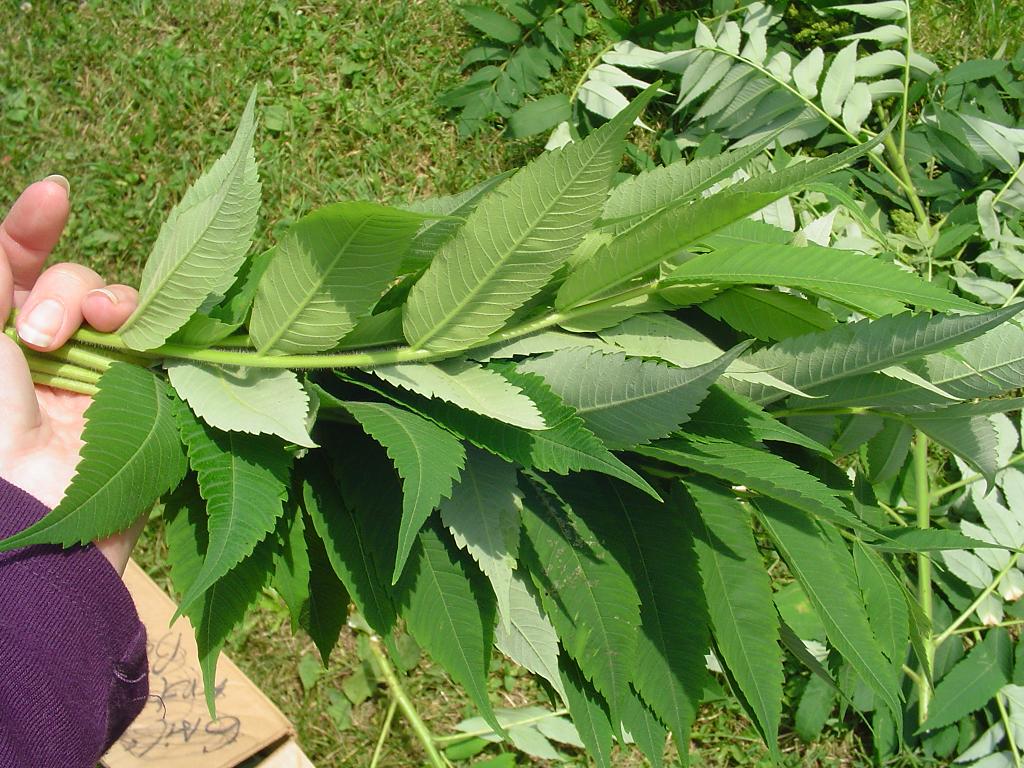
At this stage (June, new buds, fully leafed out), sumac has a main trunk with a couple branches & suckers with leaves. So I've read, it's the right time to harvest leaves & inner bark. Leaves can be harvested any time after they are fully grown, but the inner bark is soft now. Berries can be harvested after they are ripe.


I pulled the suckers off the main branches & stripped them of leaves, leaving the leaf-stems intact. This is fairly easy as the leaf stems are on alternating sides. Holding the branch upside down & doing a "spin & pluck" motion, it took me about 30 minutes to reduce the pile into leaves, trunk/branches & suckers.
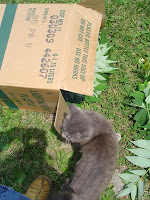
Please note: I made a serious miscalculation of leaf-mass to box-volume.
PS... Clyde helped.


Now, very important, when Humans are stripping branches from trees for inexplicable reasons, Kitties must lay on their feet to make sure the Humans don't topple themselves as they are precarious, top-heavy creatures anyway (always tripping over things - like Clyde).


OK, so the pile is now reduced to 3 things: leaves, suckers & branches... and Clyde.
That's still only 3 because Clyde counts as one - always.


The main issue was finding a spot to dry the leaves. It takes up quite a bit of space & I didn't want a place where birds would mess things up. I settled on Punky's house (sad), and spread the leaves out on a canvas tarp to dry. I set the suckers upright in a few buckets to dry in case I find that they can be used as well... no harm in tossing them out later.

I will have to toss the leaves around every day until they are completely dry or risk mold. I should have some drying racks if I were doing this "properly," or I could have bundled the stems & hung them (from what?), but this seemed like a good solution for now.

Leaves will dye several colors, brown, yellow & gray depending on fabric & mordants.


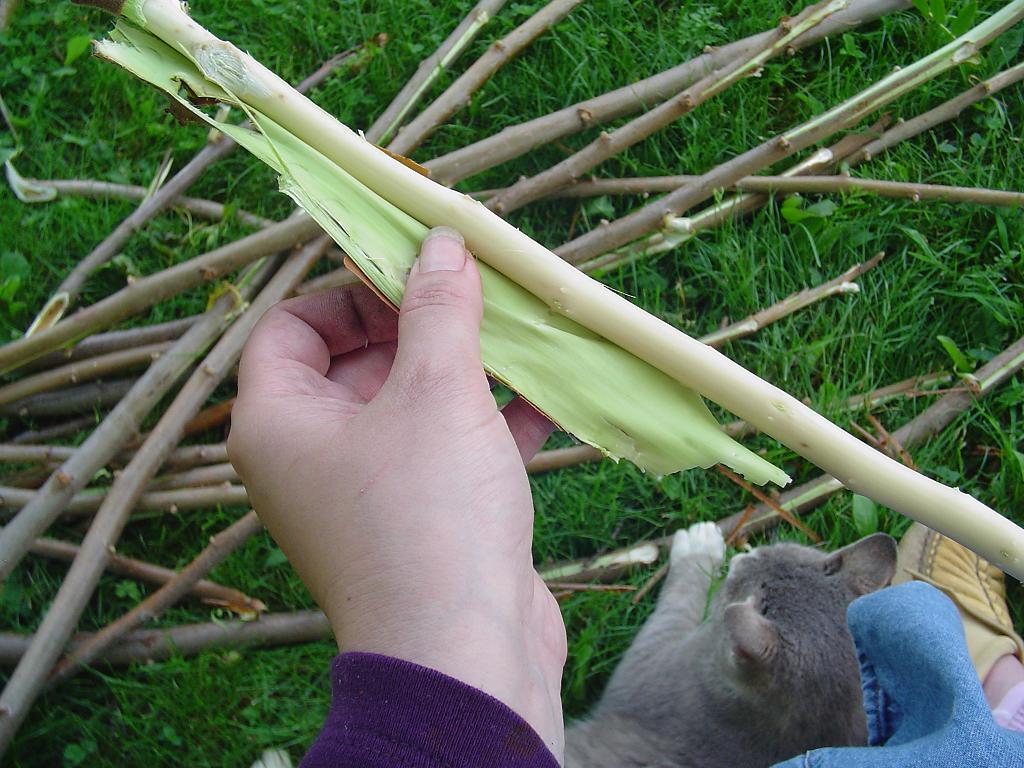
The next step in this adventure, the one I'm really after was skinning the branches for their inner bark. It's the bright green inner bark (Phloem) that we are after and it's fairly easy to get if you have a shady spot & help from Sweetie Pie.

I will admit that the sources weren't clear if I was supposed to take the Cambium too, so I did. It'll either be filler, or useful.

This dyes a bright yellow or a yellow-green.


2 different ways of doing this: stripping the bark with your fingernails, or using a knife. I found that I preferred to use my nails. Stripping from the top down worked best, as did removing the brown outer bark. When I removed it from top-down, it didn't take the green bits with it.

I'm not sure it's necessary to strip the outer bark, but all the info I found said the green inner bark is what is used. As it separated relatively easily, I figured I'd leave the brown bits off.

They are now compost.

NOTE: the Pith or most inner bark at the center of the tree also yields a bright yellow dye. Had I known this, I'd have split the sticks open. Alas.


After 3 trees & a huge pile of sticks this is what I'm left with, 1/3 of which is in the dehydrator right now... the rest will have to be laid out on newspapers for the night.


It took about 4 days of the inner bark being laid out on paper for it to dry. Fortunately we had nice, dry weather for those days. If the humidity had been up it would have taken longer.


7/21/11
The sumac leaves are completely dry. They may have been dry for a while, but I've had my hands full with other things & I figured they weren't going anywhere.

Easiest way to strip the leaves was to get a plastic grocery bag, set it open on the ground and one leaf at a time.
Holding the main vein I pulled it through my fingers & the leaves came off nice as you please. I was limited to one grocery bag because the dry bits are sharp! (also, the bird who built her nest in the building was having a fit that she couldn't get to her babies. Prettiest nest I've ever seen, she used the sumac berries & stalk bits to build it.)

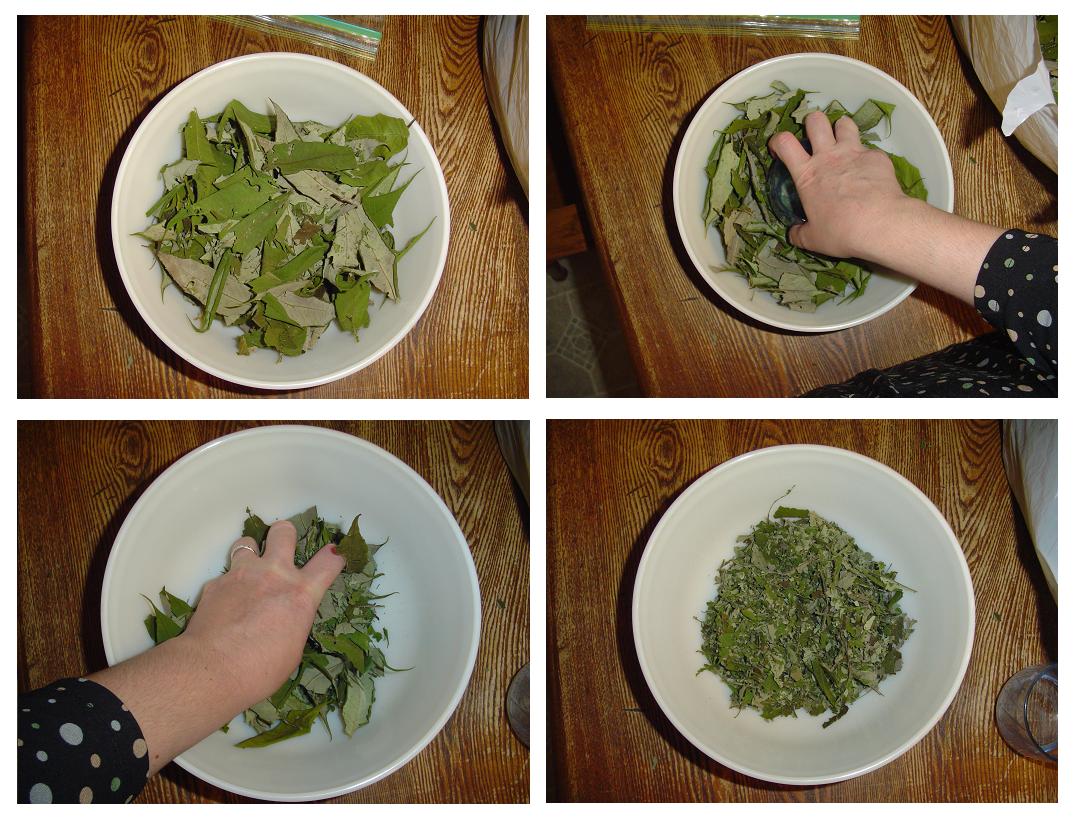
Back inside (100 in the shade today), I crushed the leaves & put them in a gallon bag. 1 grocery sack = 1 gallon in the end.
I put 2 handfuls of leaves in the bowl, crushed with a glass first & then ripped & crushed by hand. The leaves were rather silky & crushed easily. No splinters.
I did not powder the leaves because I figure that whoever is doing the final dying can handle that.