Thursday, August 23, 2012

1829-33 Dress


1829-33 Dress with Pink Ruffle of Awesomeness
 Post-surgery & post-mini-stroke, I decided to get back to "work" as soon as I could to troubleshoot the areas I'd have difficulty with.  Math was a big one.  Reading comprehension, balance, coordination & speech were all effected.  I've had to learn to slow down, in speech, typing, thought, action & self-expectations.  Full Steam Ahead isn't working because -- no steam.  Everything has gotten better, but a few areas still need a lot of work (reading comprehension - I can write, but reading directions is a real pain - literally.  Memory - I just plain forget to do things, or have obvious gaps that I know happened but can't recall at all.  Some physical things like precision hand work & turning around & stepping to the side, I lose my balance or get dizzy... and my emotions are about on par with a 4 yr. old, which is better than the 2 yr. old I was a few weeks ago... sometimes I still can't see things, or rather, my eyes work fine, but I don't understand what I'm looking at)...
But oh how far we've come!

Perhaps I should call this my Rehabilitation Dress as it presented me with numerous problem solving issues and a multitude of mistakes that required constant change of plans, rip-out, re-do, calm-down, it's OK.  The final price will never reflect the number of hours that went into this, and I'm a bit "eeh" on the finished product, but it was good for me.  It will fit a human being & she will look lovely in it - which is what matters.

This dress re-taught me my multiplication tables, addition & subtraction.  The day I was able to divide by 3 in my head was pure triumph.  Reminding myself how to do something as simple as gathering vs. pleating was a joy, because I'd forgotten how.  I wrote out directions for myself to follow.  I re-read them to see if I understood... I re-adjusted plans based on the yardage available & re-purposed several things to make the dress better than the original plan would have been.

There are some problems with it, for example: the neckline & sleeves do not fit in with the modes of the time.  While both are correct, I'm not sure a high neckline was ever paired with short sleeves.  I may cut it down at a later date if I can't find an example of this configuration.  The roller printed stripe/floral was almost always paired with long sleeves.  The fact that I was 2 yds short of the fabric I needed... well, sometimes these things happen & if I hadn't already cut it, trusting that the yardage on the tag was there, I'd have chosen different fabric.

Construction process:


Piped & pleated fronts

I'm going to skip over the front pleats & piping for now, only because explaining how I did it is making me dizzy.  I promise I'll fill in later... but I will say that if I ever do this again, I'll cut them individually & stitch them on that way - it's more fabric conservative & less likely to be the wrong direction.

Piping pinned on Back & Side Backs
Stitch the piping on the back seams (note: the CB seam should have been on the fold, not a seam - I got my wires crossed when cutting & didn't have enough fabric for a re-do).  This is not incorrect, it's just not the way I wanted this particular dress.


Bodice with way-small armholes

The bodice stitched together.  The center front bottom is raw here because that gets turned up & hand-stitched so that the pleats maintain their form.  In the future, I'd do this a bit differently, using the individual pleats, vs. a big piece of fabric.  One very tricky thing about this pattern is that the "normal" size of armholes doesn't apply.  The armhole is actually down on the arm, not at the shoulder, so it seems to be way too small, but is, in fact, the right size.  (This played with my head quite a bit trying to remember that)... but it DOES work.

Sleeve with piping & cuff
I changed my mind about the sleeves three times.  The first ones I cut were pink linen, full-length & mimicked the inspiration dress quite closely.  Once I decided to go with brown piping (I was out of pink), I switched over to this tan-ish linen that matches one of the tan bits on the bodice.  I'm not unhappy with it, but I'm not Super-Yay about the change in plans.  The piping & cuff match the dress.

Bias Strip for Hem Decoration
Due to a 2 yd. fabric shortage, I couldn't have the length of skirt I wanted with the bias ruffle out of the stripe/floral.  Alas.  Cry.  Weep.  Agony.  Creativity!  So I took the scraps & cut them into stripes & flowers, stitched them together with pink linen & did a bit of quilting magic for the hem.  By doing all this fiddly stuff I got the look of the diagonal & a fussy hem that pushes the date of the dress back just a bit in style... more in line with the late 20's than the early 30's, but then museums are full of transitional elements.
So, if you want something like this, sew strips of color together, press seams & cut on the bias.  Sew bias edges together to form a straight seam (you'll have to line it up on the straight & use a ruler to determine where to sew it - this was 1"-1.5" down the first strip depending on the width of the next one).  Try it, you'll see what I'm talking about.

Decorative Hem Construction

Next was assembling the hem on the base fabric (mint green cotton - yuck) to extend the hemline to an appropriate length (10" longer than my fabric).  I used a row of brown piping, the patchwork bias strip, several rows of piping between the brown & the green, and then a Pink Ruffle of Awesomeness.  There was much changing between the regular presser foot & the zipper foot to accomplish this.  It made me rather dizzy.  For the ruffle, I evenly pinned the fabric on & then hand-gathered it as I stitched vs. using thread to gather it in.  This is more efficient on very large pieces that don't require perfectly spaced & even gathers.

The World Needs More Pink Ruffles

The finished hem in all its Pink Ruffly Awesomeness... 
(I do wish I could learn how to make these pictures turn in the direction I want them).

It still needs a belt & a corded petticoat to go under it... maybe a pelerine just for fun.

_____________________________________________________
 
[In case you are wondering why I'm going on about personal medical stuff, well, I can't separate it out from my creative process.  It's now part of who I am, and it's a struggle to deal with it - I'm finding new mental land-mines every day, and working to overcome the things I've already found.  To get myself back to being ME, I can't deny or ignore it... so, Dear Readers, I'm afraid you'll have to read about my brain damage along with the Pink Ruffles of Awesome.]

Monday, August 20, 2012

Who Took The Time?

"It boggles my mind that people today think that the same exact people who built castles and pyramids never wore more than a rectangular sack with a belt! I'm highly amused.  "They wouldn't have taken the time" seems to be the excuse.
No, YOU don't want to take the time.
Totally different."

1408, Les Très Riches Heures du duc de Berry, December


There are works of art that just keep coming back to me as stunning examples of fiber manipulation.  Yet I'm supposed to believe that the same people who built The Seven Wonders of The Ancient World, just threw a rough and ragged bit of fabric over their shoulders & called it good?  That when the average person owned 4-10 outfits*  "they wouldn't have taken the time" to make their clothes:
1: last
2: fit
3: be of good quality or repair
4: look good
*(insert violent debate here)

This is nonsense! 
We know these people had a vast store of knowledge in areas that we scarcely remember today.  Jobs "then" were just as diverse & specialized as jobs today, and often passed along family lines, with children learning the skills of their trade from Parent's Knee, and then passing that knowledge on to their offspring.  That is a lot of specialization, practice, advancement, technical skill & care for a trade/craft.  Even accounting for continuity in styles there will be an improvement in an individual's skill over time - because they were human like us with the same ability to learn, and "Practice Makes Perfect," etc.

If you can't imagine doing "all that on top of everything else those people did just to survive," either your self-confidence is too low or you have an over-inflated idea of what "all that" really was - and a serious case of Modern Ethnocentrism.  People did not live a single-handed existence, they were part of a community that worked together to accomplish amazing things.


1408, Les Très Riches Heures du duc de Berry, June
(Because Poor People Only Wore Sacks...)


No single man built the pyramids, and no single woman clothed a nation from sheep to gown.

One of the things that most modern people say when they look at old paintings or come to reenactments is "gee, I wish we could dress like that every day!" The implication being that folks of yesteryear look infinitely better than our Zero Time, off-the-rack, single-layer sacks of today.  (Please note: not all modern clothes are ugly).
The issue comes in when we, as modern people, find out exactly how long it takes to make something like that... how much effort, how much time, how much material, how high the cost, how l-o-n-g it takes to get dressed; and so we assume that because we are not capable of that ourselves* that no one was ever capable of it. 
Please, buy another cultural lie & I'll sell you a bridge in Brooklyn... which was not built by one man alone, just so you know.
*Don't want to...


1790, Henry Singleton, The Alehouse Door
(This cap is not "Just a circle" - Trust me...)


Am I saying that there were never people who did things slap-dash?  No.  Of course there were people like that, people are the same through time, and some of us just don't care about certain things... but that doesn't mean that we don't care about anything - we take the time to care about the things we think are worth our time, dedication & effort, and we excel at them; or at least we should be.

(I will post pictures later... must go excel at sewing on a pink ruffle)...

Ummm... pretty piles of stone...
http://finland.fi/public/default.aspx?contentid=160061
This is a great article on various castles in Finland.  Please note that the folks who built these couldn't possibly have thought of cutting anything other than hose on the bias.  <-- that was Sarcasm, folks.

Wednesday, August 15, 2012

Re-writing Your Own History

Real Quick:

Ever been tempted to go back & edit the heck out of your old blog posts?  Erase all those silly beginner mistakes so some poor hapless (now) beginner doesn't stare into your old pitfalls & think it's a brilliant idea to jump right in?

Yeah... but just coming off chemo, recovering from head trauma & re-discovering the joy of normal hormone levels is probably not the best time to do this. 
Who knows what heinous mistakes will be typed out for all to see & how much worse it would be than the 3:00 a.m. ramblings of a newbee costumer? 

In other news, I'm feeling much better, the world has stopped spinning (mostly) and I'm slowly getting back to work & starting to socialize again.  I've got about enough energy to take me from 9:00 a.m. to 3:00 p.m. before I crap out on sewing, and that's slow with much cursing & ripping out & face/palm actions.  Every time I think I'm ready to start in on Important Orders I make some bone-headed mistake that tells me I'd better not cut that customer's fabric right now.  To top it all off, I do forget my head, even though it IS attached.  But it is much, much better than it was.  We aren't done with Medical Crap, but the worst is basically over.


OK, so because this should have something to do with a relevant topic, I was picking poke berries for dye today.  One of my bone-headed friends stopped over (he has no legit medical "brain-not-working" excuse for this question - NONE).
Just as an FYI, the 1/2 gallon milk carton really does have a skull & cross bones on it, with "POISON! DO NOT EAT" written all over it.  You can't possibly miss it.  I made sure.

Monday, August 6, 2012

And a Distaff.

1646-48 Old Woman Spinning, Micheal Sweerts, Flemish

I have been searching high & low for "how to dress a distaff with wool" and so far, all I've found is either vague references or flax instructions.  A few You-Tube videos show spinning from a loaded distaff, but as there is so very much in fiber preparation for your drafting, it's just plain frustrating... so, without further ado, here is how I loaded my make-shift distaff, which (with some changes) I think will work well... just take note, this did NOT work well on the first try.... nope, not at all, not one little bit. 

(Edit: 8/8/12)
I tried again last night (8/7), and by switching the distaff to between my legs, I was able to spin like nobody's business.  It shortened the distance between spindle & distaff, my drafting hand was able to control the amount coming off the fiber bundle & I was able to spin the spindle or let it go as needed.  Sometimes it was suspended, sometimes it hit my leg, but as the twist was all at the top, it didn't seem to bother the yarn one bit. 
Occasionally I had to readjust the tie or turn the distaff, or splice on more fiber, but it worked.
Still need a longer distaff & a smaller spindle - but this method works.
(End Edit)


Please note: I could be 100% wrong on this.

This is the painting maul that I used to test-run the distaff theory of the "stick & finial" variety.  It has a smooth shaft (not perfectly so), with a place to tie the ribbon at the top, which is the important thing... though I'm not sure that securing it this way is correct... the Romanian You Tube video shows the lady with her massive load of wool sorta sliding down the distaff as she goes, but many of the paintings & illuminations through centuries & various countries show the top being wrapped & secured.
http://www.youtube.com/watch?v=ShSIOF0o5js

Unfortunately, it's a bit short and the drafting zone is a little too low for perfect comfort.


wool for a bat on a distaff
The fiber has to be a relatively long staple, at least 5" to work with this method. (I think).  I'm using the "shorts" from the Border Leicester here.


carded wool bat
I found a reference to using bats of wool on the distaff, so that's what I'm doing.  Rather than rolling a rolag, I stop as soon as I've doffed the carded fleece.


Here is the "how to roll the bat onto the distaff.  (Near as I can figure)

Dressing a distaff with wool
Tie the ribbon onto the distaff, point it up (not to the side like is pictured here)
Lay the bat on the table,  with the distaff at one end of it.
Roll the distaff & bat together until you've reached the end.
Make up a few more (or a bunch more) bats & roll them on.  You can start each one a bit lower than the top bat to create a graduated cone of fiber.
Wrap the ribbon around the wool & tuck the end in on itself.

Distaff kinda dressed right.
This is the finished "dressed" distaff.

There are some problems with it that are easy fixes.
- The distaff is too short.  It has to fit comfortably on your arm, with the wool above your hand for easy drafting.  Get Longer Stick.
- The wool I used here is too "sticky."  Your wool bats must slip easily & cleanly off the distaff, this particular fiber does not.
- Longer ribbon / Silk ribbon... first, my twill tape tie is way too short.  Second, it doesn't allow the wool to "slip" past it, it catches & holds, which is not what I want it to do... I want it to hold gently, but not grip.
- My spindle is too big.  WAY too big.  Solution: get smaller spindle.

The next technique I will try is pre-drafting the fiber & winding it around a "y" shaped stick.  I think once I get the hang of it, I'll do OK.  It sure will save on shoulder strain.

I should also mention that this type of spinning is done with low whorl only, and the spindle can be long, but the rock/whorl needs to be relatively small... as you aren't doing the Greek/modern style of suspended, with an extended spin time, a smaller weight is just fine.

For your enjoyment, here are some images of women spinning wool with a distaff throughout the ages.

1529, Marten van Heemskerck,
woman spinning,
Dutch
She's spinning on a wheel, but the distaff principle is the same.
The Tenant's Daughter
Haines & Sons
1780's
Yale, London

 
1180's Normandy (the Hague)
Hers is pre-drafted


More Sheepie Fleeces! or Ba-Ba Brown Sheep!


Since I've been down after surgery, and loopy as all get-out (2 weeks & I'm still dizzy + a bunch of other mental & physical "junk"), I've been spinning to counterbalance what's happening in my head.  Not a fan of any of this, just so's ya know.  I miss my Singer, but don't want to run over my fingers because I'm zoning out; she's not the most forgiving machine in the world... and my hand-eye coordination is not yet good enough to hand sew anything.  I do not like not being sober, no matter how good the cause.

So spinning it is!

I  wanted to look at something other than "white" so I spun some pre-dyed fleece (goldenrod Border Leicester) and some black Shetland (love), but blew through that rather quickly.  Before this whole medical mess... or rather, in between the sick - in my hyper times - I scoured a Finn/Dorset 1st year cross & it came out lovely.  It's rather short staple, very fine & downy, and must be made into woolen as worsted simply won't work.  I may or may not have to ply it, but I'm leaning towards plying as I think it'll fall apart if I don't. 

Top of Finn/Dorset fleece
Underside of Finn/Dorset fleece
This is the lovely sheepie fleece,  de-sheepified (scoured) for the most part.  It's quite clean, being a first year, and very fine. 

From what I've learned, Dorset doesn't really felt well, so it's a forgiving fiber in that regard, but because it's a downy fleece, it is not easy to spin for beginners... had I known that, I never would have started spinning... nobody told me, that's all I can say.


Lock length
This is the staple length of the fiber (sorry, this format is automatically re-orienting my images & I don't know how to turn them the right way around).  You can see the length of the original lock, the natural split in the hair & how the tips are a bit weak.

You can also see how there is a color variation from base, to tip.  The undercoat is a lovely black, which lightens to a cream/white after the break, then to a nice brown & a lighter tan tip.


Clean lock
Once I pull the undercoat off & fluff out the tops, or cut the damaged ends off, the staple length ends up being about 2"-2.5" long.  Not impossible to spin, but it's a short draft fiber, which is not easy for beginners.  It IS easy to splice, thankfully.  There is a bit of VM left in the fiber, which needs to be picked out, but not much at all.


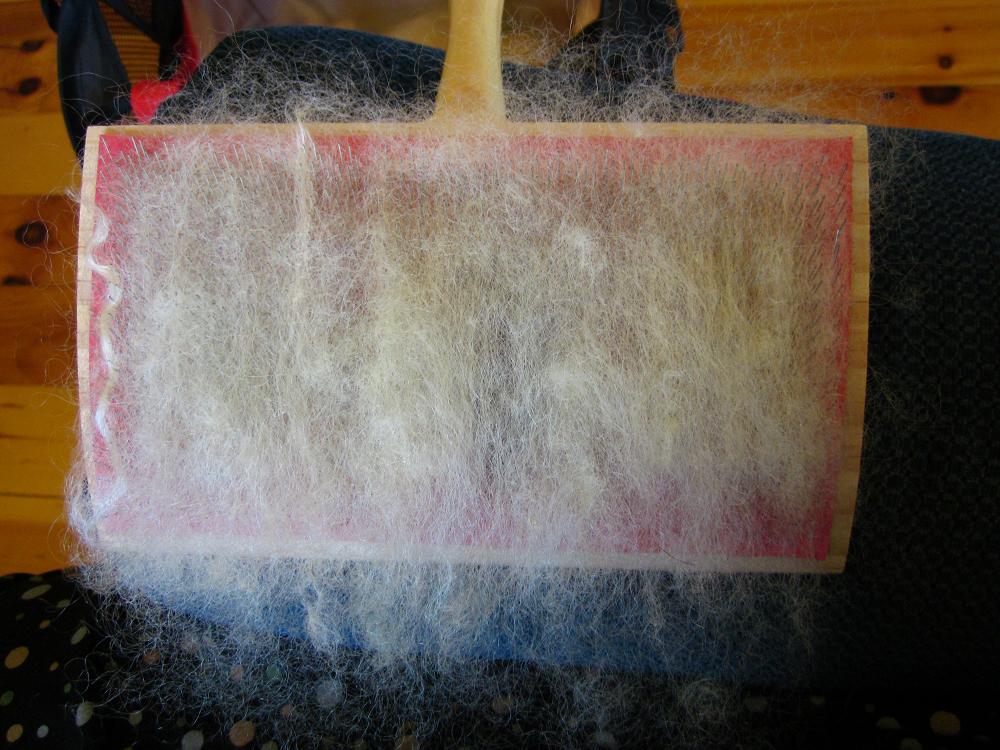
card loaded with locks
Just for fun, I've been laying the locks on the cards with the tips towards the handle... it just looks so pretty that way.  It really doesn't matter much, as when Ive passed the cards over a few times, the fibers are evenly distributed & tip to base no longer matter.  It's a nice mottled effect though.

I have been laying them out in 2 rows, and trying to keep the fibers evenly distributed.  This makes for a better rolag in the end & because I intend on plying, having approximately the same amount of fiber in each batch is semi-important... it will not work out perfectly, but it's better than total guess-work.


Carding
first pass
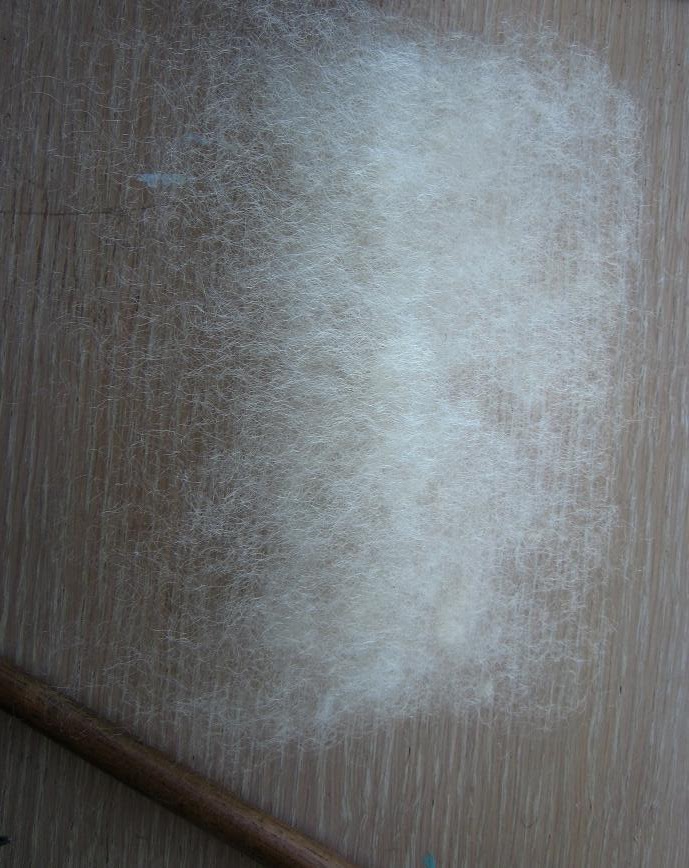
A few passes with the cards & my Dorset/Finn cross becomes a beautiful bat.  This is by far the easiest fiber I've ever carded, it just blends like a dream. 


Carded wool
Doffed bat
Here is the fiber, all carded & ready to be doffed.
Doffed bat.
(at this point, if I were loading a distaff, I'd stop & roll the bat onto that)


Rolling a Rolag
I like to roll my rolags right on the teeth of the cards.  I know a lot of people transfer the bat to the back of the card & roll there, but I find it easier to use the teeth to my advantage.  I roll in the direction the teeth are pointing & this helps blend the fibers just a little bit.

Carefully tucking the first edges in & then making sure to roll evenly will create a beautiful rolag with good "pull" from either end.  Sometimes I do choose what end to go from if one has a better draft than the other, but not often.

Rolag
Finished Rolag... I put them in cardboard sweater boxes to keep them neat.  Many people put them in a basket, and they will keep fine there if you don't have a Rosie Dog who thinks they look like Her Toys.

Next!
I also find it easier to pull the next rolag out of the sweater box than having to fight with 6 surrounding rolags in a basket.  As a bonus, the sweater boxes can be broken down & tied up in a relatively small space when not in use, and they fold up & down quite well for a long time... when they break, just recycle!

This little Finn/Dorset spins very, very fast.  It slips through my fingers so quickly it's amazing. The final yarn isn't super-soft, but it has a good spring to it & overall has a good feel.

Thursday, July 26, 2012

1823 Goodridge Chemise

My wonderful friend Tamara loaned me this original "Goodridge 1823" chemise to share with all of you.
((Edit: T. tells me she paid $15 for this little gem at some random antique store in ME.))

(If this gets a bit fuzzy in some of the words, please forgive me... post-surgery days are always a bit fun when it comes to broken thoughts).  Fortunately for you, I took excellent notes & hopefully good pictures.

When Tamara offered me the opportunity to take a pattern & study this lovely piece of work, I hesitated only because it meant toting it through several states and/or sending it through the mail.  We took care to wrap it up & transport it safely.  Considering that it's rather small, this was not a problem.

Unrolling the shift/chemise for the first time was rather exciting.  It's a lovely piece, in excellent condition, only a few stains from the original wearer, with a couple age spots and one split in the CF from a grade-school show & tell mishap.  

Here you can see the 1/2 view of the chemise, which shows the shape of the side seams quite well.

 (I will try to get the pictures to orient themselves correctly, but no promises on this new format).
Here is the chemise laid out flat in all its wrinkled glory.

It is made from a very tight weave fine linen, with a small twill tape trim on the sleeves.  Seams are welted to the Outside, or butted and whip stitched.  Neck binding is pieced & cut on the grain, and folded over to the inside.   There are 11-24 stitches per inch depending on where & what technique was used.  It is a very fine piece of workmanship.

The chemise measures as follows:
Shoulder-hem: 43"
Front neck - hem: 38.5"
Back neck - hem: 40"
Back width: 21"
Neck-hole width: 13"
Shoulder width: 4"
Bust (flat) 24" (total of 48")
Hips: 29" flat (total of 58")
Hem: 76" total
Side gores: 20.25 long, 7.25 wide (2 on each side)
Sleeve length: 7.5" with 0.25" trim
Sleeve width: 12" (total)
Sleeve gusset: 4x4 finished
Sleeve set in: 10" down
Distance between gores on side seam 16" (side of chemise)
Hem turn-over: 0.75"


In no particular order...

The neckline is cut 13" wide, and 2.5" down in the back, 4.5" down in front (finished), on an oval shape.
The binding strip was cut on the straight, in pieces to help go around the corners, and then turned under and hem-stitched to the inside.  The first seam is about 15 stitches per inch (the one attaching the binding strips), which you can see in places on the outside edge.  The hemming was done with 11 stitches per inch. for a 1/8" - 1/4" wide finished hem... it is narrower going around the curves.

You can see (picture at top) where "Goodridge 1823" was printed in what I believe is walnut ink at the CF edge, (I can't be sure of this as age may have dulled the original color).

The sleeves and side seams were initially sewn with 6 tiny running & 1 back stitch on the outside, and then welted under with careful whip stitching, approximately 14 stitches per inch.

The side gores were first butted together on the salvage edges of the chemise body & gore straight edges and whip stitched in a tiny 22 stitches per inch seam. (The body & gore are sewn straight edges together).  Then the entire side seam was constructed towards the outside, and was folded over into a welted seam.  This leaves the center of the gores a bit lower than the rest of the hem, which was not evened out, it was just hemmed as-is (below).

The hem is a consistent 3/4" deep, with about 14-16 stitches per inch in a diagonal & straight hem stitch.

The sleeves were constructed as one component and set in the side seam... again, all seams are on the outside, except for the hem on the cuff, which is turned under and overcast, and the twill-tape trim folded into shape and tack-stitched to that.

The following pictures show the sleeves in various views.  Hopefully you will be able to make them large enough to see some of the details.

Left Sleeve.  You can see the trim, neckline & seams clearly here.  The gusset was cut on a square and folded over.  There was a bit of shaping to the armscye on a diagonal cut to help shape the sleevehead to the body.

Detail of trim & cuff hem.  I hope you can see the tiny stitches used to create the hem on this.


Finished Cuff Trim.  The twill tape was folded to accomplish this rather elegant trim detail.

Finished Cuff with a tape measure for sizing purposes.  The trim is remarkably even, but not perfect.  I did not find the starting & ending points of the trim, it was that well hidden.

Last detail of the trim.  If I ever get this ambitious, someone give me a gold sticker, please.

There are minor sweat stains on the front bustline where a corset would have pressed the cloth to her body, also around the back.

There is one small repaired tare along the bottom hemline that is so well done I was amazed that we found it.  It was certainly made by the original owner, as the stitching is identical to the rest of the garment.

The purpose of making this blog post was to show an original 1823 chemise to the public for free use.  The original "Goodridge 1823" chemise is privately owned, and I have full permission in the form of a big "Yes Please!" to publish the particulars.  It is our hope that this will help you in your research & costuming adventures, no matter what they may be.  We do ask that you not use this post to profit commercially (ie, make a pattern for sale), as those permissions are separate, but please do use it for educational & recreational reasons!
As this chemise is almost the same as any chemise/shift from the 1650's on, it would not be possible to prove our case, but please be honorable.

Wednesday, July 4, 2012

Solar Dehydrator for Dyestuffs (or whatever)

It Dries!
It Dries Dyes!
A while back my electric dehydrator decided to fizzle out.  The fan stopped working, so while it goes round & round, nothing is happening.  On the 3rd day of trying to dry some sage, rosemary & cilantro (food), I about had a screaming fit & just shoved everything in paper bags to finish drying. 
Around that same time I saw a FB post of the prettiest garden box ever... turned out to be a solar food dehydrator.  Massively cool.

At that point, I decided that low-tech is better & as the "sun produces enough energy in one day to power America for a year," or some such like that, Solar it is!

I looked up various versions of a solar food dehydrator & decided to go with one I could build & move, and store inside when not in use... and one that I could make from materials on hand.  The one I ended up building is similar to this
http://www.territorialseed.com/product/13577/online_specials
except not nearly as pretty & it sits on a table, not on legs (see above).  Also, no nifty temp gauge. 
If you don't like this design, or don't want to pay that much for one, just go to Google Image Search & type in "how to make a solar food dehydrator" and about a million plans will pop right up, from super-fancy to cardboard box versions. 
There is a pdf. instruction guide that I saved but can't find again "dehydrator guide with photos" and "dehydrator plans" that is really decent.

I did make the door open up vs. dropping down because while I like the shelf idea, it was just too big to be able to reach the front of the dehydrator without some serious gymnastics... and we all know stuff is going to fall at some point.  A hook & eye safety latch will take care of the "crush your head" issue.

Materials:
Purchased:
$5 Garden plastic for my "black" bits & about $7 on hardware (screws, staples, hinges) for a total of $12 in purchased materials... I may have to calk the cracks for more efficient airflow, which would bring the cost up to around $15.
Re-used:
I used scrap wood on hand, bits left over from when my parents built the addition on the house, scrap lumber that was too short for other things or too knotty for structural projects & an old window that I /think/ came out of the laundry room that they tore down years ago.  The frame is in terrible shape on the outer edges, & the glass is cracked in one place... but for this, it'll work.  I used some old metal shelves that came from ??? for my drying racks & I can put gauze or smaller mesh screen or whatever over them as needed.  Paint was left over from the addition, (which still needs more paint in places).

Since I'm using it to dry dyestuffs, not food, the food safety aspect wasn't a huge issue for me.  I was able to skimp on the food grade screens & I didn't worry about the low VOC plastics or paints.  If I ever do want to dry food, I can always switch out the screens & find different plastic (it's just stapled in).  The paint should be fine after a few weeks anyway, but please do your research if you are going to use this for food; we get enough toxins from commercial food - no point adding them to your home-grown stuff.

The basic principle of the dehydrator is that the air comes in the bottom front opening (screened over), flows up through the airspace & exits the rear top opening (screened over).  The window lets light in to provide the means of heat (sunlight).  The black in the bottom & back wall heats the air as it goes through.  It's very much like a car in a parking lot. 
You can control how much heat & light get in by turning the box toward or away from the sun, and blocking off airflow, or covering some of the black with white cloth, etc. 

While I'm not sure how long some things will take to dry, it does work quite well.  My sage was dry in 2 days & so were the day lilies that I'm collecting for orange dye.  The Queen Ann's Lace seems to be taking a bit longer, which is interesting, if nothing else.

It does have to be taken inside when it's raining as it will wear out quickly if left out in the weather.  You could potentially make a weather-proof cover for it, like the ones they have for gas grills, but personally, I'd rather just bring it in.  In theory, you could use it in a window in the wintertime.

Should be loads of fun, and it's already proving useful.  I don't have to worry so much about things molding or getting rained on if a little sprinkle comes along, or the cats spraying on my dyestuffs (yuck), or a million other problems that come with open-air solar drying.