I had not intended this to become a cooking blog, but cooking is just about the only creative/expressive thing I get to do these days aside from reading "Moo, Ba, La La La," which, while fun, is not original or creative... though you'd be amazed at how creative you can get re-reading the same paragraph over & over.
I was asked to be feastocrat for Hunter's Moon, and the event was yesterday. It was exciting, interesting, painful, frustrating, exciting, frustrating, infuriating, and ultimately worth doing because that was a fabulous meal. I planned for 60 but we seated 30, so I had chicken and pies left, but not much else. We only threw out about 1 head of lettuce (salad) and the rest got distributed among the guests. I cooked the left-over chicken today & put it up in the freezer for future Shire events. Unfortunately I didn't take pictures, I was busy cooking (sorry!).
Preparation took several days/weeks and a lot of help. I made up the liquimen, garum & pork forcemeat way ahead of time.
The custard was cooked on Thursday, the chicken marinated then too.
Chicken was stuffed on Friday, grapes picked & carrots/parsnips cut up and marinated.
Everything else was cooked on location that day.
Here is the menu plan, and below you will find the original recipes with my changes & instructions. I took nearly everything from Apicius (various translations) and I'm honestly not sure which part was my favorite. I tried to choose recipes that had a progression of flavors without everything tasting the same, and a good balance of nutrients without too much fat/salt/whatever. I wanted a colorful meal, and I admit I also wanted to avoid boiled meat at all costs.
I had an original budget of $400, which got upped to $500, but I came in under $400 in the end.
Sideboard: *(this is the snack table, when it runs out, it's gone.)
Bread – Wegmans, various white & wheat *(one rye, not period). 5 loaves *(should have gotten more).
Cheese – 1st platter: soft cheese (goat), bree (goat), salted hard cheese (sheep), Gouda *(should have gotten more)
2nd platter: cheddar, swiss, monteray jack, Munster
Fruit – grapes *(store green seedless, wine grapes from arbor - these were a hit BTW), dates,
figs *(dates didn't go over well)
boiled eggs – 40, *have 3 left
Beverages:
Vinegar Water *(this is close to an electrolyte drink and very tasty)
Water 1 gal
Apple cider vinegar 3 tbsp *(the guys wanted a lot more)
Honey 3 tbsp *(again, a lot more, like 1/3 c.)
Preparation: dissolve honey into
warm vinegar. Mix into water, taste, add more water or honey/vinegar until it's good. Serve at room temperature or cool.
*We actually ended up serving this slightly warm as it was a chilly day.
*Refill as necessary.
Faux Spiced Wine
Based on recipe in The Classical Cookbook, p. 101
White
grape juice 2
gal
honey ¾ c.
ground black pepper ½
tsp.
bay leaf 1
saffron powder 1
pinch (~1/8 tsp)
Put
2/3 cup of the juice in a saucepan with the honey and bring it to a boil. Skim
if necessary. Repeat and remove from the heat. Add the seasonings while it is hot:
this speeds up the flavouring process. When it is
cold, add the rest of the juice and allow to stand
overnight. To serve, strain through a fine sieve or muslin.
*We didn't strain it, just took out the bay leaf & left the saffron. We watered it by 1/3 so everyone could have 2 glasses.
This may well have been my favorite thing at the feast. It tastes
exactly like a good white wine without the drunk that goes with alcohol.
Coffee & tea
Obviously not part of a Roman feast, but a necessary component of any American gathering. Brew a big pot. Have milk, sugar & sugar substitute. You don't have to like it, you still have to do it.
Special:
Salad:
[109] ENDIVES AND LETTUCE INTUBA ET LACTUCÆ
ENDIVES
[are dressed] WITH BRINE, A LITTLE OIL AND CHOPPED ONION, INSTEAD OF THE REAL
LETTUCE [1] IN WINTER TIME THE ENDIVES ARE TAKEN OUT OF THE PICKLE [2] [and are
dressed] WITH HONEY OR VINEGAR.
[1] Hum. pro lactucis uere; Tor. p. l. accipint;
G.-V. p. l. vero (separated by period)—all indicating that endives are a
substitute for lettuce when this is not available.
Ingredients:
lettuce 7 lbs total
endive heads 3 lbs
Red onion 1-2 onions
Liquimen 1 c.
Olive oil 1 c.
Honey ½ c.
Salt 2
tsp.
Dressing: Mix olive oil, liquimen,
salt & honey together. Put in
containers so guests can use as they wish.
*We ended up pouring the dressing on the salad due to a lack of containers.
Preparation:
Cut lettuce & endives into pleasant size pieces. Put in serving bowl. Chop
onion fine and add a little to each bowl
* We sliced the onions so people could easily pull them off.
Special:
"Don't kill the king" dressing:
1/4 c. olive oil
1/4 c. vinegar
1/8 c. white wine
3 tbsp honey
1/4 tsp black pepper
Whisk together, bottle & let the king pour his own dressing. Motto of the feast "don't kill the king."
*I did not get to try the salad. However, when tasting the dressings I preferred the one I whipped up for Tindal (no fish sauce) to the one everyone else got, though both are very good. The downside to the first dressing is that it is not very good after a few days, so it's a make & use kind of thing.
Side Dishes:
[72] ASPARAGUS ASPARAGOS
ASPARAGUS [Tor. IN ORDER TO HAVE IT MOST AGREEABLE TO THE
PALATE] MUST BE [peeled, washed and] DRIED [1] AND IMMERSED IN BOILING WATER
BACKWARDS [2] [3].
Ingredients:
Asparagus 200 stalks (8 bunches)
Water several
gal.
Salt 1 c.
Olive Oil 1 c.
Liquimen ½ c.
Black Pepper 3 tbsp
Cut tough ends off asparagus (if small),
peel tough skin (if large - use a knife, the peelers gum up, yes it makes a difference, yes it takes a lot of time). Reassemble in bunches
of like sizes & tie with butcher’s twine.
Stand upright in a pan of boiling salt water reaching 1/3 – ½ way up the
stalks & cover. Remove when tender
10-20 minutes (thinner is less time, fatter is more time, they are done when the heads wilt over - don't let them sit). Drain, lay on serving tray and sprinkle with
dressing.
*I got smalls, so I just tied the bunches, then removed the rubber bands & boom, done.
Dressing:
Mix olive oil and liquimen, sprinkle with black pepper.
Special:
"Don't kill the king"
Tindal got olive oil & black pepper on his asparagus.
People who said "I don't like asparagus" liked this. It was kind of amazing, though I honestly prefer the baked asparagus my husband makes. This fit the meal though.
CARROTS OR PARSNIPS ARE FRIED [and served] WITH A WINE
SAUCE.
Carrots 12 lbs
Parsnips 8 lbs
Olive Oil 2 c.
(reserve 1)
Cooking Wine 1
c.
Liquimen ½ c.
Preparation: Peel & slice carrots & parsnips into
coins, marinate in wine sauce.
Sauce: Mix ½ olive oil, wine
& liquimen together. Marinate
carrots & parsnips overnight or a few hours in bags or bowls.
Cook in hot skillet with
remaining olive oil.
*I ended up changing the wine to grape juice only because we couldn't find the cork screw that night.
Special:
"Don't kill the King" ended up being olive oil & wine.
These are good warm or cold. We had some for dinner today & they were quite delicious even without being re-heated.
Main Course:
[396] STUFFED DORMOUSE [1] GLIRES
IS STUFFED WITH A FORCEMEAT OF PORK AND SMALL PIECES
OF DORMOUSE MEAT TRIMMINGS, ALL POUNDED WITH PEPPER, NUTS, LASER, BROTH. PUT
THE DORMOUSE THUS STUFFED IN AN EARTHEN CASSEROLE, ROAST IT IN THE OVEN, OR
BOIL IT IN THE STOCK POT.
Ingredients:
Chicken breasts 60
– 70 breasts
Ground pork 6
lbs
fennel 1 lb
Pine nuts 1 lb
Ground chicken ~2 lbs
Black pepper ¼ c.
Garlic cloves, crushed ~2 bulbs
Olive oil (as needed)
White wine, reduced 1
qt. (as needed)
Forcemeat: Mix ground pork,
fennel, pine nuts, black pepper, garlic and chicken broth/wine into a fine
sausage-like mixture. Chicken
trimmings can be added now or later.
Refridgerate overnight or freeze until ready to use. *(I skipped the wine/broth, and all the chicken went into its own forcemeat).
Stuffed Chicken Breasts: Trim chicken breasts so there is a fat end (the back
of the dormouse) and a pointed end (the nose).
Add trimmings to the forcemeat.
Slit the least attractive side with a knife & add forcemeat. Tie the chicken breast closed with butcher’s
twine *(I used a plug of chicken meat vs. tying, it turned out fine & cut down on plate-time).
Baking:
Add a little broth & olive
oil to the roasting pan, set breasts inside.
Cover roasting pan & bake until done. May have to baste with chicken broth to keep from drying out.
350F for 25-30 min (note: longer cooking time for more meat, don't squeeze things in a pan, give them room to cook). Use a thermometer to know when it's done. 120F is technically done, 160F is done-done and on the verge of drying out; any higher & it's Dry Chicken City.
Garnishing:
Add cloves or raisins for eyes and nose, and chives or other herbs for
whiskers. *(they got set on lettuce leaves on pretty plates - no eyes/nose/whiskers.
Note: I had to use a cheaper chicken breast than I had planned, so marinating it overnight was necessary. This turned out to be a FANTASTIC decision. 4 c. grape juice, 3/4 c. salt, heat to dissolve salt, marinate breasts in bags, top off with water.
Special:
We baked 4 chicken breasts with chicken forcemeat so the "no piggies" contingent had a lovely meal too (plus, I had 2 lbs of chicken trimmings left).
Dessert:
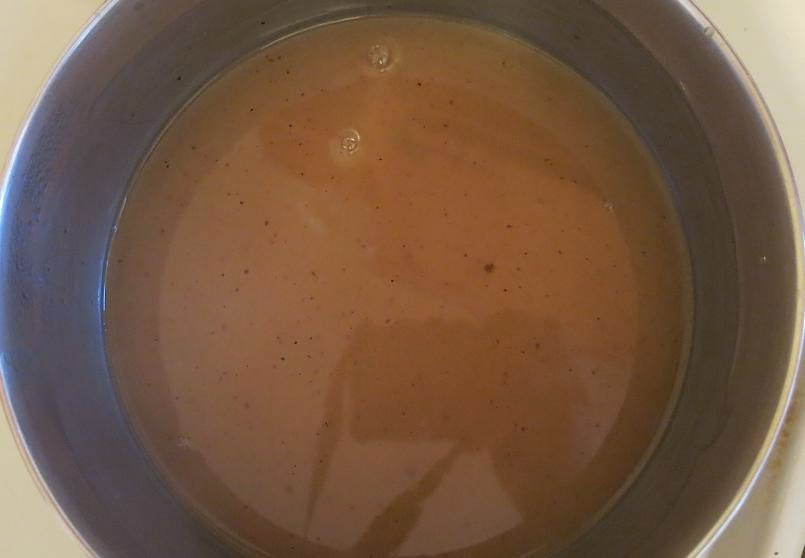
ROMAN CUSTARD
Take sufficient milk for the size of the cake pan.
Mix the milk with honey just as if you were making milk food. Then put in five
eggs to a pint of the honey-milk mixture, or three eggs to half a pint.
Dissolve the eggs into the milk so that the resulting mixture is smooth. Strain
into a clay vessel and cook over a slow fire. When the custard is firm,
sprinkle with pepper and serve. (Apicius Book 7, XI-7)
Ingredients:
milk 1 cup
cream 1 cup
honey 3
tbsp
eggs 4 lg / 5 med.
Liquimen 1 tsp
Black pepper ~3
tbsp
Flour 2
cups
Lard 2/3
c.
Salt ½
tsp
COLD Water 4-6 tbsp
Filling; Mix milk and cream. Heat to just warm in the microwave or on a
stovetop. Add honey slowly while
whisking quickly. Beat eggs and liquimen in a separate bowl until frothy. Combine the eggs & milk mixtures and beat again. Pour into prepared
crusts, sprinkle pepper on, cover with foil and cook in slow oven at 350F for about an hour
Crust: Mix flour & salt. Cut in lard until crumbs form. Add cold water 1 tbsp at a time until moist
enough to roll out. Roll to ¼” thick,
put in pie plates. Fill with custard
& then roll the crust in & DOWN to just above the level of the custard.
*Don't use Crisco, it's too sweet and clashes with the custard. If you don't want to cook with lard, just skip the crust.
Note: there is no mention of a crust on the original recipe, but in order to serve that many people it makes it easy to cut & plate.
Note: A deep dish is better than a pie plate. It has a much better jiggle when it's a thick slice v. a thin one.
Special:
"Don't kill the king"
As above, except I baked it in a proper deep dish, without crust (didn't bring the flour to the site) and I replaced the liquimen with the faux wine.
This tastes like a typical custard pie, but with a subtle twist.
Please feel free to use these recipes as you choose. Obviously most of them are for ridiculous numbers of people, and I vastly underestimated the amount of asparagus people would eat, so if you do that & really have 60, you need 16 bunches, not 8. We could have stretched the carrots & parsnips to feed 60, but I really only had a little left over, so personally I'd rather have everyone leave happy and full than wanting more for fear of waste.
- Please, for the love of all that is good manners, don't ask me to adjust the recipes for you. You have a brain, you figure it out. I have every confidence in your ability to reduce/substitute/estimate/etc. Google has a great conversion tool as well.
- MY GOD DON'T EAT IT IF YOU ARE ALLERGIC TO IT!!! I made substitutions for Tindal on the fly because I found out that morning that he's allergic to fish, not just shellfish; and if I can do it, so can you.
- Don't ask me about the calories. Since they refuse to scream if I burn them or not, I'd prefer they just come & go quietly.


.JPG)


